Ingredients
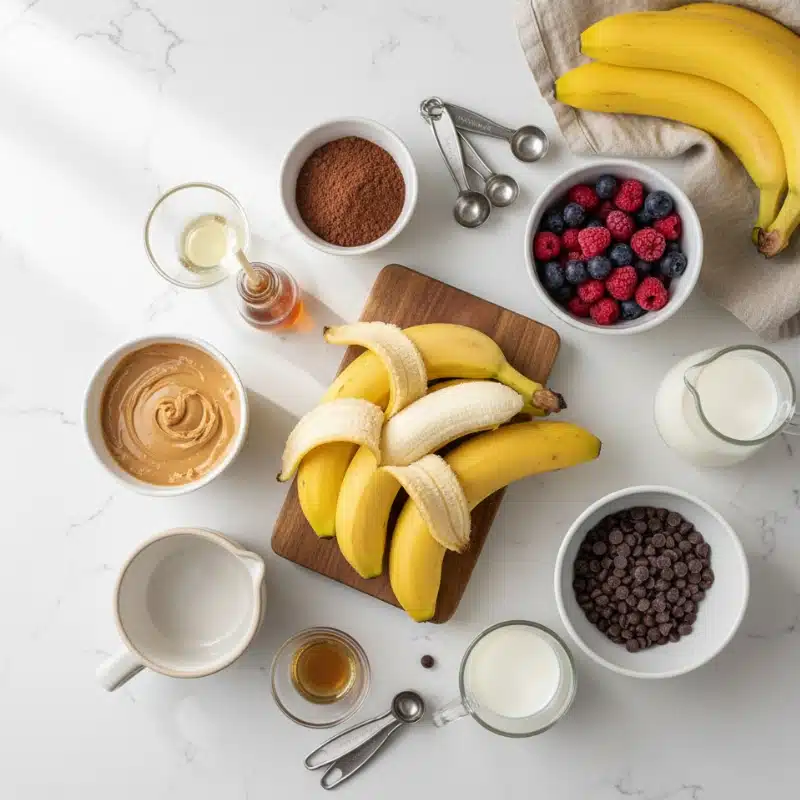
- 3 ripe bananas, peeled, sliced, and frozen
- 1-2 tablespoons milk of choice (dairy, almond, oat, or coconut)
- 1/2 teaspoon vanilla extract (optional)
Optional Mix-ins:
- 2 tablespoons cocoa powder (for chocolate version)
- 1/4 cup peanut butter or almond butter
- 1/2 cup frozen berries (strawberries, blueberries, or mixed berries)
- 2 tablespoons chocolate chips
- 1 tablespoon honey or maple syrup (for extra sweetness)
Instructions
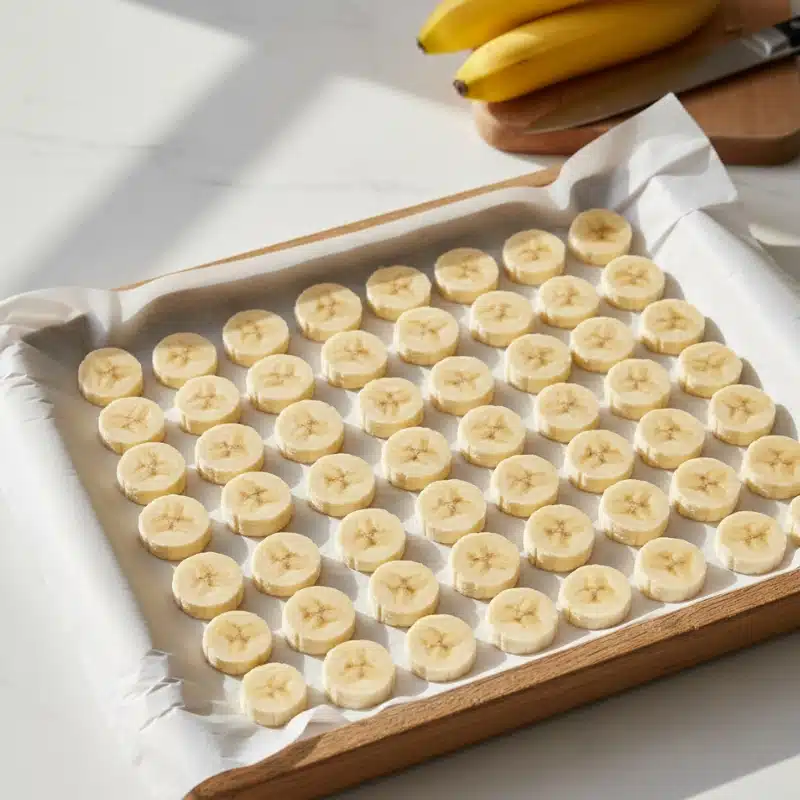
Step 1: Freeze the Bananas
Peel and slice ripe bananas into coins about 1/2-inch thick. Place them in a single layer on a parchment-lined baking sheet. Freeze for at least 2 hours or overnight until completely solid.
The Secret: Nice Cream Science 101 (The Why)
Before you blend, understand the magic! Bananas contain naturally high levels of starch and lower water content compared to most other fruits. When frozen, this starch prevents the formation of large, hard ice crystals, allowing the structure to maintain a creamy, fat-like texture that perfectly mimics soft-serve ice cream.
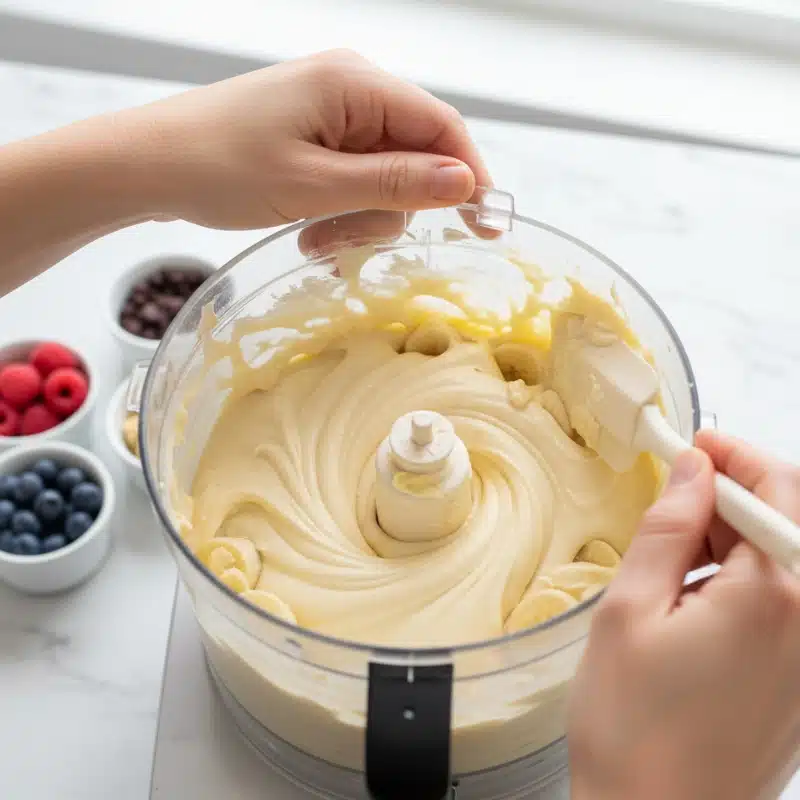
Step 2: Blend Until Creamy
Add frozen banana slices to a high-powered blender or food processor. Start blending on low speed, gradually increasing to high. The bananas will go through stages: crumbly, then clumpy, then suddenly smooth and creamy like soft-serve ice cream. This takes about 3-5 minutes.
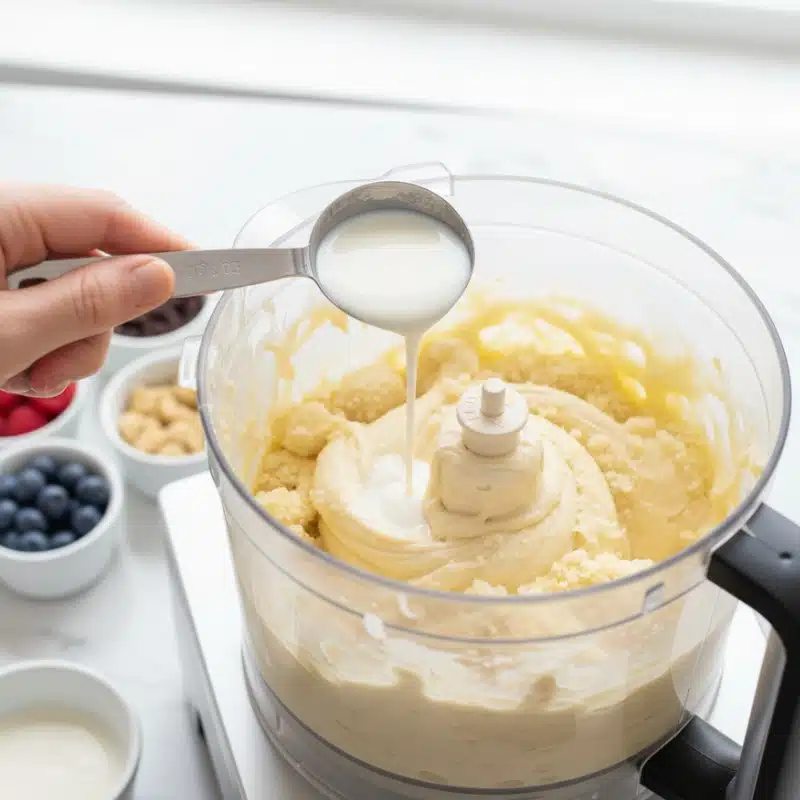
Step 3: Add Liquid as Needed
If your blender struggles or the mixture seems too thick, add milk one tablespoon at a time. Scrape down the sides of the blender between pulses to ensure even blending.
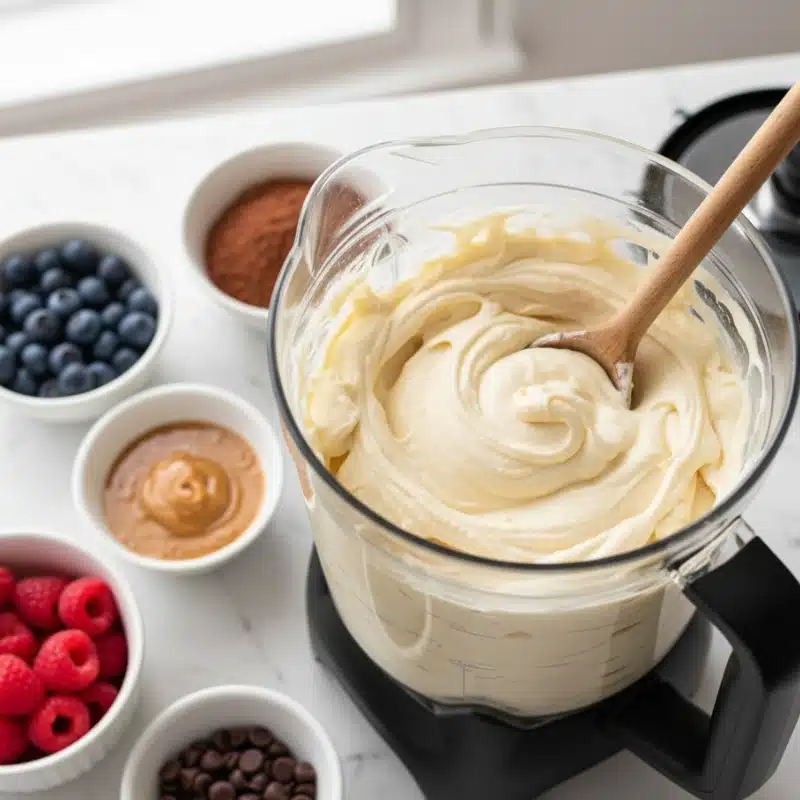
Step 4: Add Flavorings
Once the base is creamy, add vanilla extract or any optional mix-ins like cocoa powder, nut butter, or frozen berries. Blend again for 30 seconds until fully incorporated.
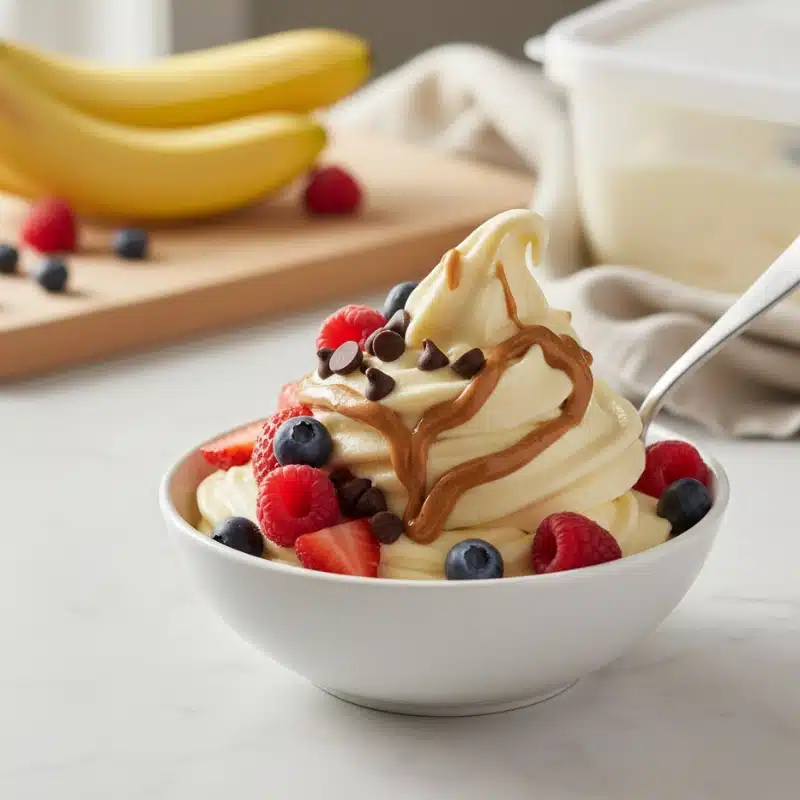
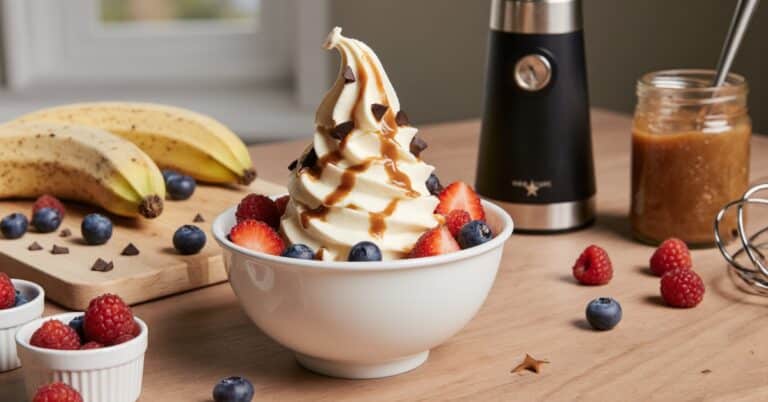
Step 5: Serve Immediately or Freeze
For soft-serve consistency, serve the banana nice cream immediately. For a firmer texture similar to traditional ice cream, transfer to a freezer-safe container and freeze for 30-60 minutes before scooping.
Freezer Texture Tip (The Science)
Bananas contain natural sugars that harden when frozen. Letting your nice cream rest for 5–10 minutes before scooping allows those sugars to soften, restoring creaminess.
Notes
Banana Selection: Use very ripe bananas with brown spots for maximum natural sweetness. The riper the banana, the sweeter your nice cream will be without needing added sweeteners.
Freezing Tips: Freeze banana slices in a single layer first to prevent clumping. Once frozen solid, transfer to a freezer bag for longer storage (up to 3 months).
Blending Success: A high-powered blender (Vitamix, Blendtec) or food processor works best. If using a standard blender, let frozen bananas sit at room temperature for 5 minutes before blending to soften slightly.
Texture Troubleshooting: Keep blending past the crumbly stage. The mixture will suddenly transform from grainy to smooth. This takes 3-5 minutes of continuous blending. Don’t give up too early.
Storage: Store leftover banana nice cream in an airtight container in the freezer for up to 1 week. The texture hardens after freezing. Let sit at room temperature for 5-10 minutes before scooping, or re-blend briefly to restore creaminess.
Flavor Variations: Chocolate: add 2 tbsp cocoa powder + pinch of salt. Peanut Butter Cup: add 1/4 cup peanut butter + 2 tbsp chocolate chips. Berry: add 1/2 cup frozen strawberries or mixed berries. Tropical: use coconut milk + 2 tbsp shredded coconut.
Serving Suggestions: Top with chopped nuts, fresh fruit, granola, coconut flakes, or a drizzle of nut butter. Serve in waffle cones for an authentic ice cream experience.
- Prep Time: 5 minutes
- Cook Time: 0 minutes
- Category: Dessert
- Method: Blending/No-Bake
- Cuisine: American
- Diet: Vegetarian