
These elegant tiramisu cups bring the classic Italian dessert into a convenient, single-serving format that’s perfect for entertaining or treating yourself. This no bake recipe delivers all the coffee-soaked ladyfinger and creamy mascarpone goodness of traditional tiramisu in adorable individual portions. Whether you’re a busy parent looking for an impressive make ahead dessert or hosting a dinner party, these tiramisu cups are incredibly simple to prepare and always impressive.
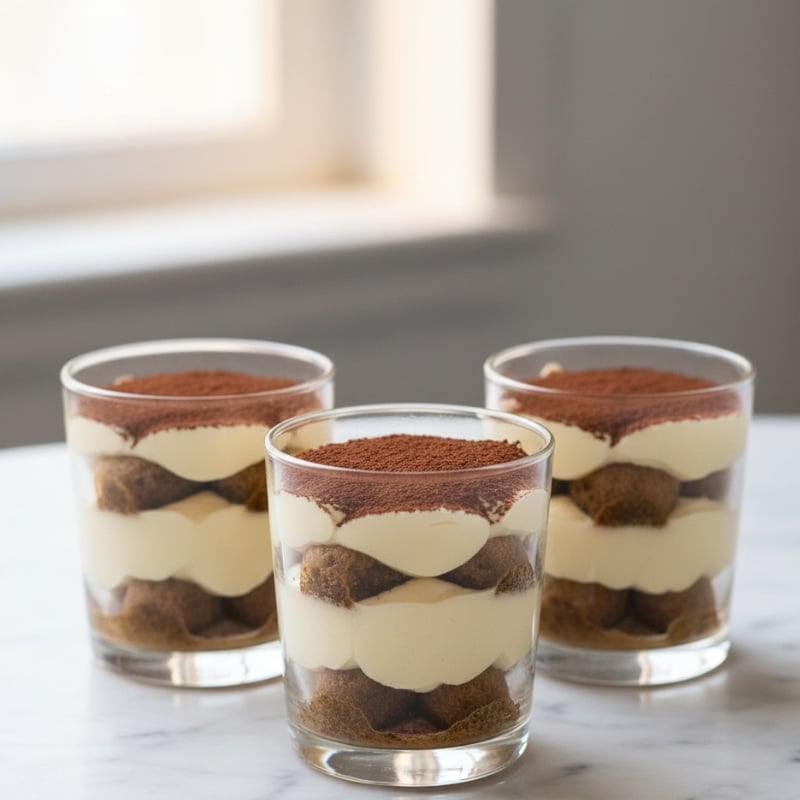
Table of Contents
The first time I tasted tiramisu was in a small café in Rome. I was amazed at how such a simple dessert could feel so elegant. When I came back home, I wanted to recreate that same taste but in a quicker, more practical way. That’s how I fell in love with making tiramisu cups the same classic Italian flavor but beautifully served in individual portions. This recipe comes together with just 15 minutes of active prep time, making it the perfect stress-free dessert.
Tested & Approved
Every recipe concept that earns our Tested & Approved badge goes through a rigorous evaluation against the Roz Recipes standard. We carefully analyze the ingredient synergy, verify the nutritional balance, and ensure the methodology is optimized for quick, everyday cooking. This specific combination is approved because its flavor profile is structurally sound, offering a perfect balance of taste, texture, and visual appeal designed to succeed in any home kitchen.
Quick Recipe Overview
| Metric | Detail |
| Prep Time | 15 minutes |
| Chill Time | 2 hours |
| Total Time | 2 hours 15 minutes |
| Yield | 6 servings |
| Difficulty | Easy |
Ingredients
For the Coffee Dip
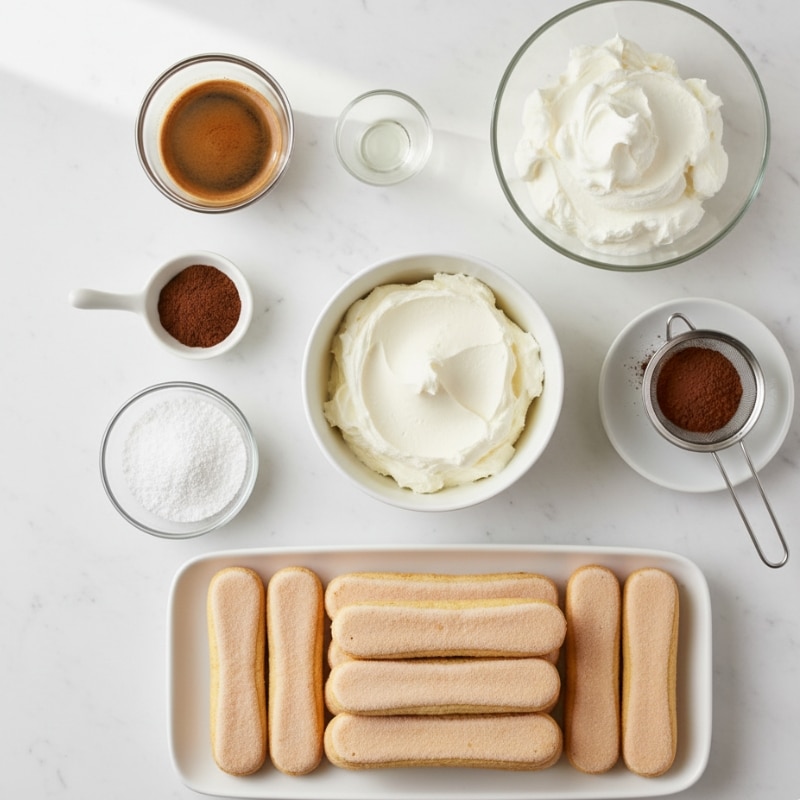
- ¾ cup (180 ml) brewed espresso coffee, cooled (you may need a little more)
- 1 teaspoon vanilla extract (or almond extract for variation)
For the Espresso Mascarpone Cream
- 1 cup (240 ml) heavy whipping cream (See Note 1)
- 1 teaspoon instant espresso powder
- ½ cup (60 grams) powdered sugar (icing sugar)
- 1 cup (250 grams) mascarpone cheese (See Note 2)
To Assemble
- 12 savoiardi cookies (Italian ladyfingers) (See Note 3)
- Cocoa powder for dusting before serving
Instructions
Step 1: Prepare the Coffee Mixture & Whip the Cream
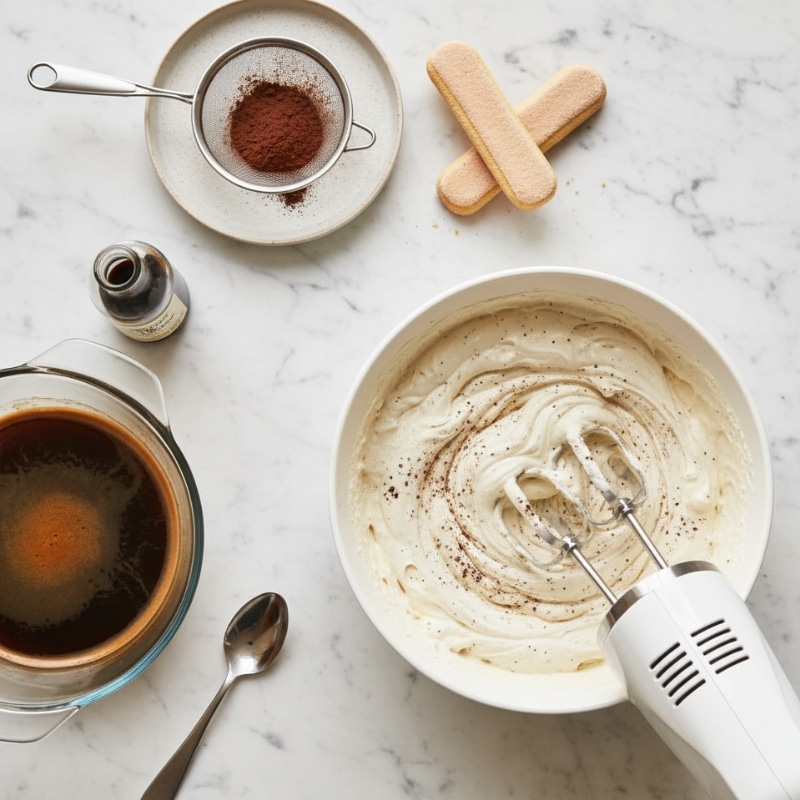
In a shallow dish, mix the cooled brewed espresso with vanilla extract (or almond extract, if preferred), then set aside.
Meanwhile, using a hand or stand mixer, whip the heavy cream with powdered sugar and instant espresso powder until soft peaks begin to form.
Step 2: Combine Mascarpone & Finish the Cream
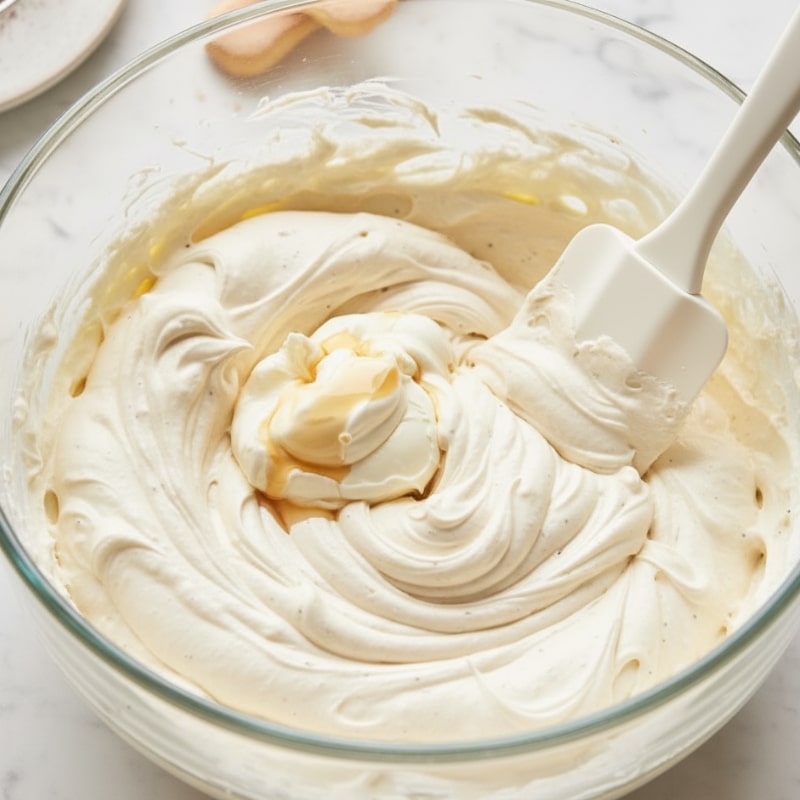
In a separate bowl, stir the mascarpone cheese until smooth. Gently fold it into the whipped cream mixture, whisking just until firm peaks form — avoid overbeating to keep the texture light and airy.
Step 3: Dip Ladyfingers & Start Layering
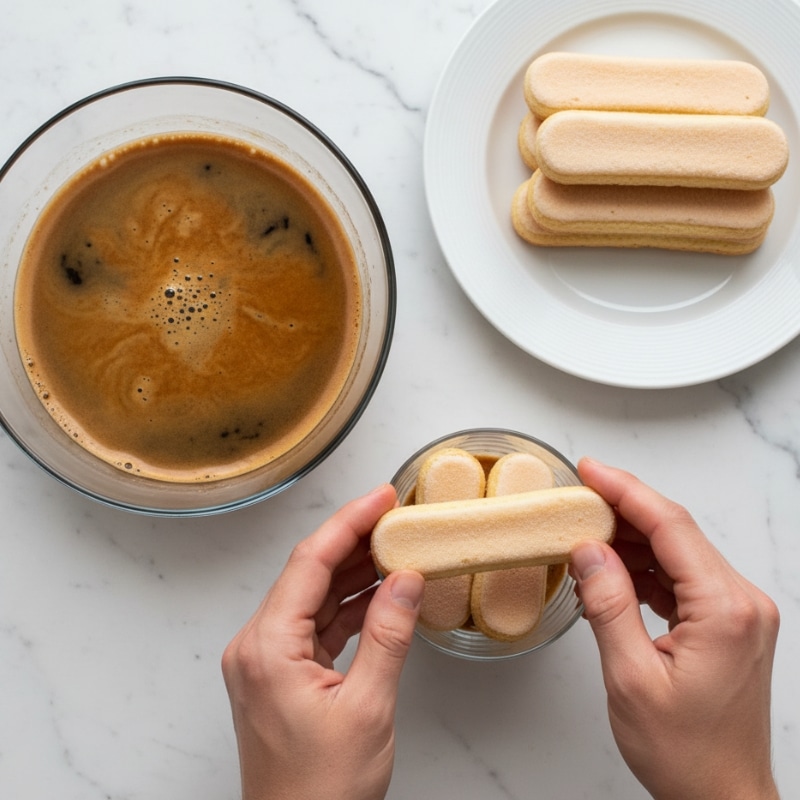
Cut each savoiardi cookie in half and quickly dip the pieces into the coffee mixture so they’re soaked but not falling apart.
Place two dipped halves at the bottom of each serving glass or dessert cup.
Step 4: Add Cream & Second Layer
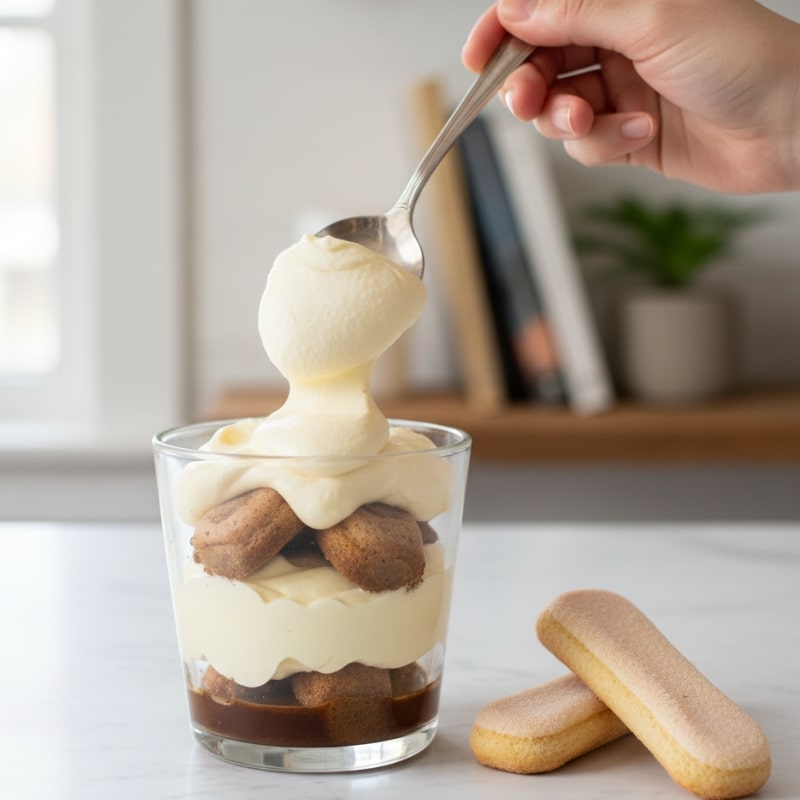
Spoon about two heaped tablespoons of the mascarpone cream over the cookie base and spread evenly.
Add another two soaked halves of ladyfingers on top, followed by a second layer of cream.
Step 5: Repeat Layers & Chill
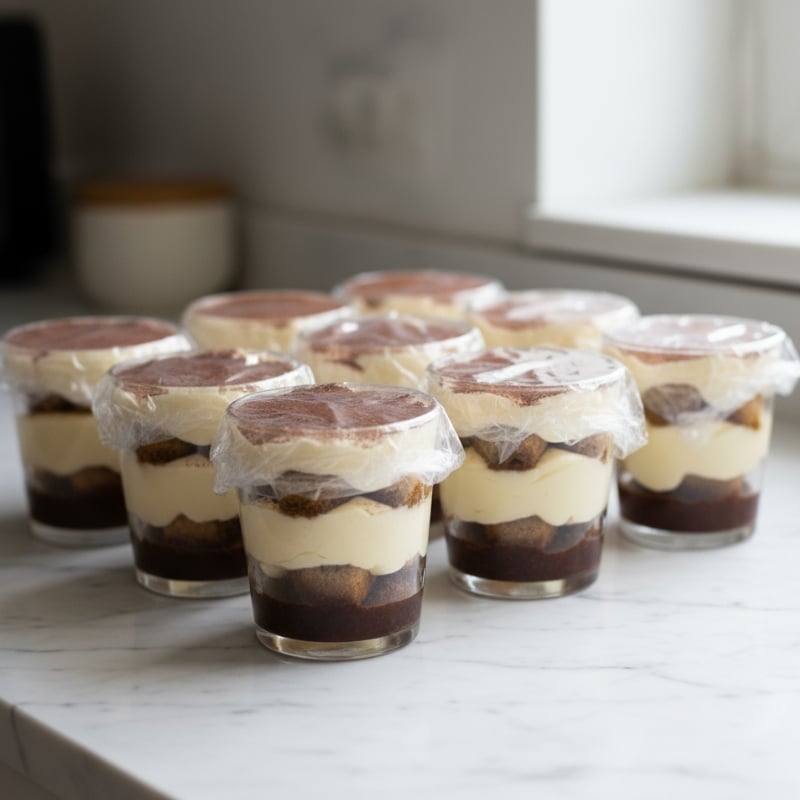
Continue layering the remaining glasses until all the cookies and cream are used.
Cover each cup tightly with plastic wrap and refrigerate for at least 2 hours (or overnight) to allow the flavors to meld and the texture to set beautifully.
Step 6: Finish & Serve
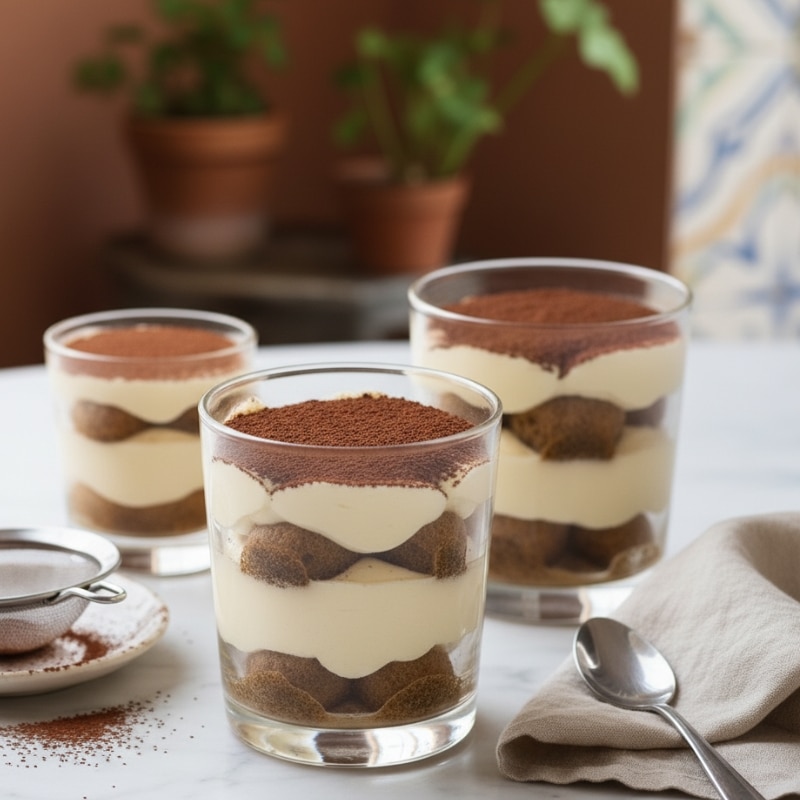
Just before serving, dust the tops generously with sifted cocoa powder.
Optionally, garnish with a few coffee beans or a light sprinkle of instant espresso powder for a café-style presentation.
Did you make this Tiramisu Cups recipe? Share your experience in the comments below! And if you loved it, don’t forget to give it a rating. Your feedback helps other readers (and Google!) know this recipe is worth trying.
Tips, Variations & Storage
Soaking Secrets: How to Avoid Soggy Tiramisu Cups
The key to a perfect tiramisu cup is to avoid the dreaded soggy bottom. For a sturdy, cake-like layer, quickly dip each side of the ladyfinger in the coffee mixture for one second only before placing it in the cup. If you use the classic Italian Savoiardi (firmer), you can allow a slight pause; for softer ladyfingers, dip and lift immediately.
Substitutions & Variations
- Decaf version: Use decaffeinated coffee and omit the instant espresso powder if serving to caffeine-sensitive guests.
- Extra chocolate: Add a layer of finely grated dark chocolate between the layers for additional richness.
- Different vessels: Use wine glasses, small mason jars, or even disposable cups for easy party service.
Make-Ahead Tips
These tiramisu cups are actually better when made ahead. Prepare them up to 24 hours in advance and store covered in the refrigerator. The flavors deepen and the texture becomes even more luxurious. Just remember to add the cocoa powder dusting right before serving to keep it looking fresh.
Storage Instructions
- Refrigerator: Store covered tiramisu cups in the fridge for up to 3 days. The cocoa powder may dissolve slightly over time, so add a fresh dusting if needed.
- Freezer: While not recommended for best texture, you can freeze these for up to 1 month. Important Note: Upon thawing, the cream may separate and become slightly grainy. Thaw overnight in the refrigerator before serving.
Serving Suggestions
Serve these tiramisu cups with a small spoon and perhaps a demitasse of espresso alongside for the ultimate Italian dessert experience. They’re perfect for dinner parties, bridal showers, or even a romantic dessert for two.

FAQs About Tiramisu Cups
Can I use regular coffee instead of espresso?
Yes you can use strong brewed coffee, but espresso provides a more intense flavor that’s traditional in tiramisu. If using regular coffee, make it extra strong or reduce it slightly to concentrate the flavor.
What if I can’t find mascarpone cheese?
Mascarpone is essential for authentic tiramisu, but in a pinch, you can blend 8 oz cream cheese with 3 tablespoons heavy cream and 2 tablespoons sour cream as a substitute. The flavor won’t be quite the same, but it will work.
Do I have to use marsala wine?
Traditional tiramisu includes marsala, but it’s optional. You can substitute with coffee liqueur (Kahlúa), dark rum, or omit the alcohol entirely and use extra espresso instead.
Why did my cream become grainy?
This happens when the mixture is overbeaten. Also, your ingredients may be at drastically different temperatures. Make sure your mascarpone is at room temperature before mixing (as noted in Note 2) and stop beating as soon as firm peaks form. It’s better to slightly underbeat than overbeat.
Can I make these in one large dish instead of cups?
Absolutely! Use an 8×8-inch dish and follow the same layering process. You’ll have a traditional tiramisu that serves 6-9 people when cut into squares.
How long do the tiramisu cups need to chill?
A minimum of 2 hours is required for the layers to set and flavors to meld, but 4-6 hours or overnight is even better for optimal texture and taste.
Can I make this cream with egg yolks for a richer flavor?
Yes for a richer, more traditional flavor without using raw eggs, you can prepare a Tempered Zabaglione. Whisk your egg yolks and sugar over a double boiler (bain-marie) until the mixture reaches 160°F (71°C). Cool this mixture before folding it into the mascarpone. This provides a rich taste safely.
Nutrition Facts
| Amount Per Serving (1 tiramisu cup) |
| Calories: 385 |
| Protein: 6g |
| Carbohydrates: 28g |
| Fat: 27g |
| Saturated Fat: 16g |
| Cholesterol: 95mg |
| Fiber: 0g |
| Sugar: 18g |
Note: Nutrition information is approximate and will vary based on exact ingredients used.
Conclusion
These tiramisu cups combine the elegant flavors of a classic Italian dessert with the convenience of individual portions. Perfect for entertaining or simply treating yourself, this easy recipe requires no baking and comes together in just 15 minutes of active prep time. The make-ahead nature makes them ideal for busy hosts who want to impress without last-minute stress. Give this recipe a try and discover why tiramisu cups have become such a popular dessert choice for gatherings of all kinds!
Recipe Notes
Note 1 – Heavy Cream: Use cold heavy whipping cream straight from the refrigerator for best whipping results. Avoid ultra-pasteurized cream if possible, as it doesn’t whip as well.
Note 2 – Mascarpone: Bring mascarpone to room temperature about 30 minutes before using to prevent lumps when mixing. Look for it in the specialty cheese section of your grocery store.
Note 3 – Savoiardi: Italian ladyfingers are firmer and more absorbent than regular ladyfingers. If you can only find soft ladyfingers, remember to reduce the soaking time significantly to prevent them from becoming too soggy.
If you enjoyed this Tiramisu Cups, please share it with friends or save it on Pinterest for later. Every share helps me keep creating simple and delicious recipes for you.
Print
Tiramisu Cups: The Best 15-Minute No-Bake Individual Recipe
These elegant tiramisu cups bring the classic Italian dessert into a convenient, single-serving format. This no-bake recipe delivers all the coffee-soaked ladyfinger and creamy mascarpone goodness of traditional tiramisu in adorable individual portions. Perfect for entertaining or a delightful personal treat, these make-ahead dessert cups are incredibly simple to prepare with just 15 minutes of active prep time, making them ideal for busy parents or dinner parties. Discover how to create this impressive yet easy Italian dessert
- Total Time: 2 hours 15 minutes (includes chill time)
- Yield: 6 servings
Ingredients
For the Coffee Dip
- ¾ cup (180 ml) brewed espresso coffee, cooled (you may need a little more)
- 1 teaspoon vanilla extract (or almond extract for variation)
For the Espresso Mascarpone Cream
- 1 cup (240 ml) heavy whipping cream (See Note 1)
- 1 teaspoon instant espresso powder
- ½ cup (60 grams) powdered sugar (icing sugar)
- 1 cup (250 grams) mascarpone cheese (See Note 2)
To Assemble
- 12 savoiardi cookies (Italian ladyfingers) (See Note 3)
- Cocoa powder for dusting before serving
Instructions
In a shallow dish, mix the cooled brewed espresso with vanilla extract (or almond extract, if preferred), then set aside.
Meanwhile, using a hand or stand mixer, whip the heavy cream with powdered sugar and instant espresso powder until soft peaks begin to form.
In a separate bowl, stir the mascarpone cheese until smooth. Gently fold it into the whipped cream mixture, whisking just until firm peaks form — avoid overbeating to keep the texture light and airy.
Cut each savoiardi cookie in half and quickly dip the pieces into the coffee mixture so they’re soaked but not falling apart.
Place two dipped halves at the bottom of each serving glass or dessert cup.
Spoon about two heaped tablespoons of the mascarpone cream over the cookie base and spread evenly.
Add another two soaked halves of ladyfingers on top, followed by a second layer of cream.
Continue layering the remaining glasses until all the cookies and cream are used.
Cover each cup tightly with plastic wrap and refrigerate for at least 2 hours (or overnight) to allow the flavors to meld and the texture to set beautifully.
Just before serving, dust the tops generously with sifted cocoa powder.
Optionally, garnish with a few coffee beans or a light sprinkle of instant espresso powder for a café-style presentation.
Notes
Note 1 – Heavy Cream: Use cold heavy whipping cream straight from the refrigerator for best whipping results. Avoid ultra-pasteurized cream if possible, as it doesn’t whip as well.
Note 2 – Mascarpone: Bring mascarpone to room temperature about 30 minutes before using to prevent lumps when mixing. Look for it in the specialty cheese section of your grocery store.
Note 3 – Savoiardi: Italian ladyfingers are firmer and more absorbent than regular ladyfingers. If you can only find soft ladyfingers, remember to reduce the soaking time significantly to prevent them from becoming too soggy.
Soaking Secrets: For a sturdy, cake-like layer, quickly dip each side of the ladyfinger in the coffee mixture for one second only. For softer ladyfingers, dip and lift immediately.
Alcohol-free option: Replace marsala wine (if used in other recipes) with coffee liqueur, rum extract, or simply use additional espresso for a family-friendly version.
Decaf version: Use decaffeinated coffee and omit the instant espresso powder if serving to caffeine-sensitive guests.
Extra chocolate: Add a layer of finely grated dark chocolate between the layers for additional richness.
Different vessels: Use wine glasses, small mason jars, or even disposable cups for easy party service.
Make-Ahead Tips: Prepare up to 24 hours in advance and store covered in the refrigerator. Add cocoa powder dusting right before serving.
Storage – Refrigerator: Store covered tiramisu cups in the fridge for up to 3 days. Add a fresh dusting of cocoa if needed.
Storage – Freezer: Can be frozen for up to 1 month, though not recommended for best texture (cream may separate/become grainy upon thawing). Thaw overnight in the refrigerator.
Serving Suggestions: Serve with a small spoon and perhaps a demitasse of espresso. Perfect for dinner parties, bridal showers, or a romantic dessert.
Grainy Cream: This often happens when the mixture is overbeaten or ingredients are at drastically different temperatures. Ensure mascarpone is at room temperature and stop beating as soon as firm peaks form.
Large Dish Version: Can be made in an 8×8-inch dish, serving 6-9 people.
Chilling Time: A minimum of 2 hours, but 4-6 hours or overnight is even better for optimal texture and taste.
Enrich with Egg Yolks (Optional): For a richer flavor without raw eggs, prepare a Tempered Zabaglione by whisking egg yolks and sugar over a double boiler until 160°F (71°C), then cool before folding into mascarpone.
- Prep Time: 15 minutes
- Cook Time: 0 minutes (No-Bake)
- Category: Dessert
- Method: No-Bake, Layering
- Cuisine: Italian
- Diet: Vegetarian